在Windows 11下利用PowerShell配置NIC Teaming
在之前我们提过,Windows 11官方不支持使用Intel® PROSet and Intel® Advanced Network Services. Intel® Network Adapter Driver for Windows® 10。那如何在在Windows 11下配置NIC Teaming呢?经过测试,我们可以通过PowerShell命令来实现此功能,具体参看下面的操作过程。
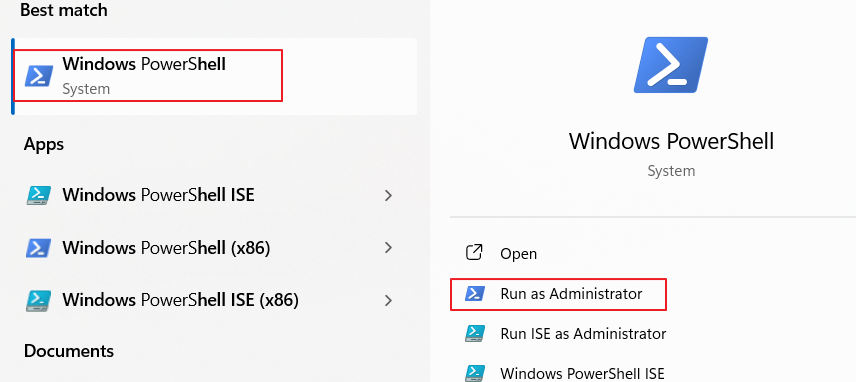
- 以管理员身份运行PowerShell

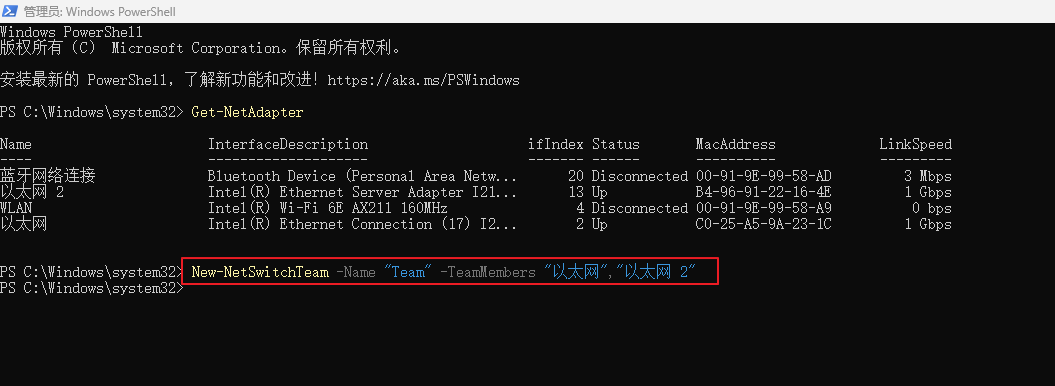
- 查看已安装的网卡:Get-NetAdapter

- 选择用于配置NIC Teaming的两块网卡,配置NIC Teaming: New-NetSwitchTeam -Name "Team" -TeamMembers "以太网","以太网 2"

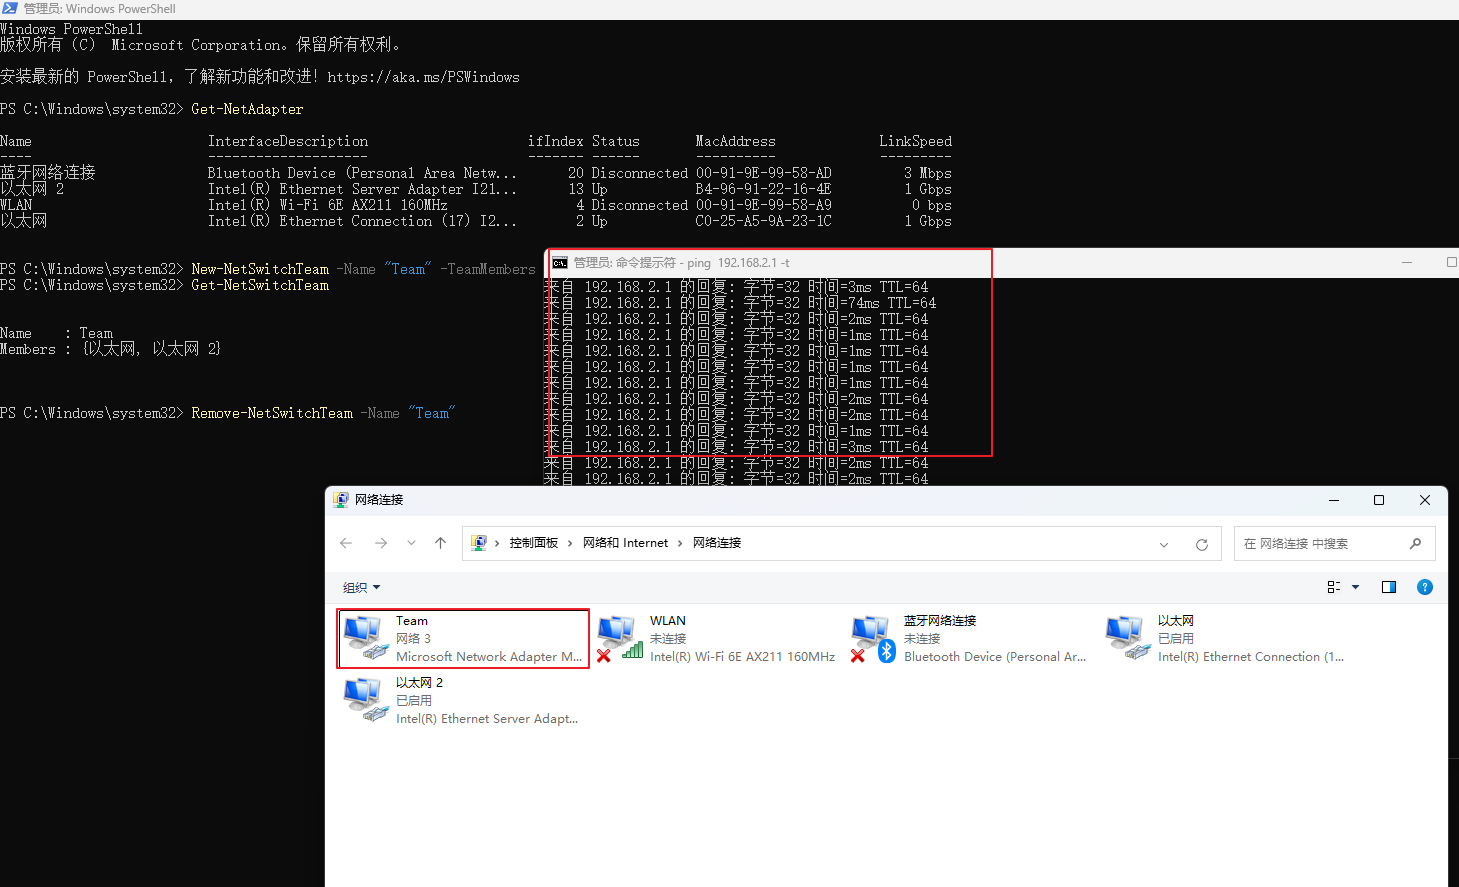
- NIC Teaming建完,查看NIC Teaming信息:Get-NetSwitchTeam

- 进入网卡界面查看状态,然后打开一下命令窗口,使用ping进行持续ping,,在这过程中拔掉一条网线或插上一条网线,查看是否会掉网

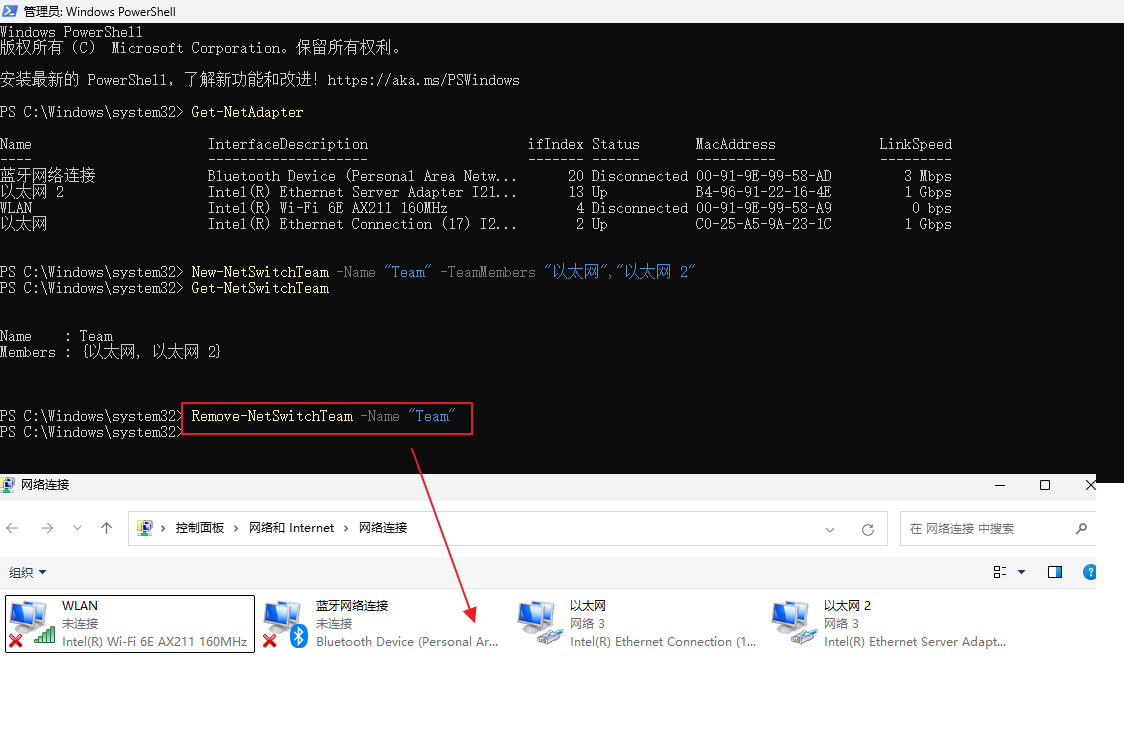
- 如何取消NIC Teaming:Remove-NetSwitchTeam -Name "Team" Team为之前建的NIC Teaming名字

另外NIC Teaming还有一些模式,可根据实际情况设置
Example 1: Set the teaming mode
PowerShellPS C:\> Set-NetLbfoTeam -Name "Team1" -TeamingMode LACPThis command sets the teaming mode of the team named Team1 to LACP.
Example 2: Set the load balancing algorithm
PowerShellPS C:\> Set-NetLbfoTeam -Name "Team1" -LoadBalancingAlgorithm HyperVPortThis command sets the load balancing algorithm of the team named Team1 to HyperVPorts.
Example 3: Set the teaming mode and load balancing algorithm
PowerShellPS C:\> Set-NetLbfoTeam -Name "Team1" -TeamingMode LACP -LoadBalancingAlgorithm HyperVPortThis command sets the teaming mode and load balancing algorithm of the team named Team1 at the same time. The teaming mode is set to LACP and the load balancing algorithm is set to HyperVPorts.
阅读剩余
版权声明:
作者:jackbo
链接:https://www.jackbo.com/archives/1233
文章版权归作者所有,未经允许请勿转载。
THE END